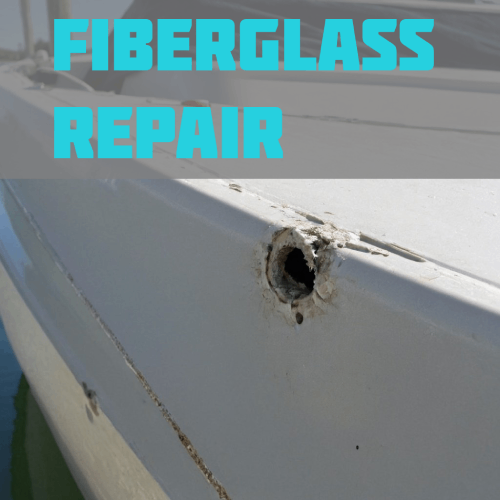
How to Repair Boat Holes with Fiberglass, Epoxy, and Fairing Compound: A Comprehensive Guide
Maintaining your boat’s hull is crucial to ensure it remains seaworthy and aesthetically pleasing. Fiberglassing and patching holes can seem daunting, but with the right materials and techniques, it’s a task you can accomplish yourself. In this guide, we’ll walk you through repairing holes in your boat using TotalBoat’s high-quality epoxy and fairing compound products. Let’s dive in!
Table of Contents
- Introduction
- Materials and Tools Needed
- Preparing the Area
- Applying the Fiberglass Patch
- Using Epoxy Resin
- Applying the Fairing Compound
- Sanding and Finishing
- Conclusion
1. Introduction
Repairing holes in your boat’s hull is essential for maintaining its integrity and performance. TotalBoat offers a range of products that make this process straightforward and effective. We’ll cover everything from preparation to final touches, ensuring your boat is ready for the water.
2. Materials and Tools Needed
Before starting, gather all necessary materials and tools. Here’s a list of what you’ll need:
- TotalBoat Epoxy Resin Kit
- TotalBoat Fairing Compound
- Fiberglass cloth
- Sandpaper (various grits)
- Mixing cups and sticks
- Respirator
- Protective gloves and eyewear
- Acetone (for cleaning)
- Scissors (for cutting fiberglass)
- Putty knife or spreader
3. Preparing the Area
Preparation is key to a successful repair. Follow these steps to get the area ready:
- Clean the Area: Clean the damaged area with soap and water, then wipe it down with acetone to remove any grease, wax, or contaminants.
- Sand the Edges: Use medium-grit sandpaper to sand around the hole, creating a 12:1 beveled edge. This helps the fiberglass patch adhere better.
- Cut the Fiberglass: Cut pieces of fiberglass cloth to cover the hole. You’ll need multiple layers, each slightly larger than the last to create a strong patch.
4. Applying the Fiberglass Patch
- Mix the Epoxy: Follow the instructions on the TotalBoat Epoxy Resin kit to mix the resin and hardener.
- Apply the Epoxy: Brush a layer of epoxy onto the sanded area around the hole.
- Place the Fiberglass: Lay the largest piece of fiberglass cloth over the hole and saturate it with epoxy. Use a spreader to smooth out any air bubbles.
- Layer Up: Continue adding layers of fiberglass, each one slightly smaller than the previous, saturating each layer with epoxy.
5. Using Epoxy Resin
The epoxy resin will bond the fiberglass to the hull, creating a solid repair.
- Cure Time: Allow the epoxy to cure according to the manufacturer’s instructions. This usually takes about 24 hours.
- Inspect the Patch: Once cured, inspect the patch for any air bubbles or imperfections. Sand any rough areas with medium-grit sandpaper.
6. Applying the Fairing Compound
To ensure a smooth finish, use TotalBoat Fairing Compound.
- Mix the Compound: Mix the fairing compound according to the instructions.
- Apply the Compound: Use a putty knife to spread the compound over the patched area, filling any low spots or imperfections.
- Smooth the Surface: Smooth the compound with the putty knife, feathering the edges into the surrounding hull.
7. Sanding and Finishing
- Sand the Fairing Compound: Once the fairing compound is cured, sand the area with fine-grit sandpaper until smooth.
- Final Touches: Clean the area with a damp cloth to remove dust. If needed, apply a second layer of fairing compound and sand again for a perfectly smooth finish.
- Paint: Apply marine-grade paint to match the rest of the hull, protecting the repaired area from UV rays and water damage.
Repairing holes in your boat with TotalBoat products ensures a durable and professional finish. With careful preparation, application, and finishing, your boat will be ready to face the waves again.
By following these steps, you can effectively repair holes in your boat, ensuring its longevity and performance. Happy sailing!


 No products in the cart.